Chrome Extension Relay is now live in OpenClaw Setup
You can now connect your real local Chrome browser to your managed OpenClaw instance using the official Chrome Extension relay workflow. This unlocks practical browser automation on the tabs you already use every day, while keeping your instance gateway private and access-controlled.
What shipped
- New Addons section: Chrome Extension tab in your instance dashboard.
- Secure relay session generation: one-click, short-lived session credentials.
- Guided setup steps: install extension, load in Chrome, run node host, attach tab, test in chat.
- Cross-platform commands: ready-to-copy commands for macOS/Linux and Windows.
- Safer token UX: explicit guidance to use OPENCLAW_GATEWAY_TOKEN for extension auth.
- Debug controls: optional advanced WS URL and relay token copy actions for troubleshooting.
Why this matters
A lot of browser tooling demos break at the exact point where people need reliability: “works in sandbox, fails in real workflow.” Teams don’t care that a browser task succeeded in an isolated synthetic tab. They care that the assistant can interact with the actual tab where they are already logged in, already navigating, and already doing work.
Chrome Extension relay support closes that gap. Instead of only driving a remote browser context, your OpenClaw assistant can coordinate with your real local Chrome session, attached intentionally per tab. That makes many high-value workflows dramatically more practical: research tab summarization, form assistance, routine operations, and context-aware browser tasks that depend on your live environment.
You keep managed hosting, security boundaries, and operational simplicity on the server side — while getting controlled access to a real user browser on the client side.
How to use it in OpenClaw Setup
The dashboard includes a short setup checklist. Below is the expanded version, with operational notes that reduce first-run friction.
Step 1) Generate a secure relay session
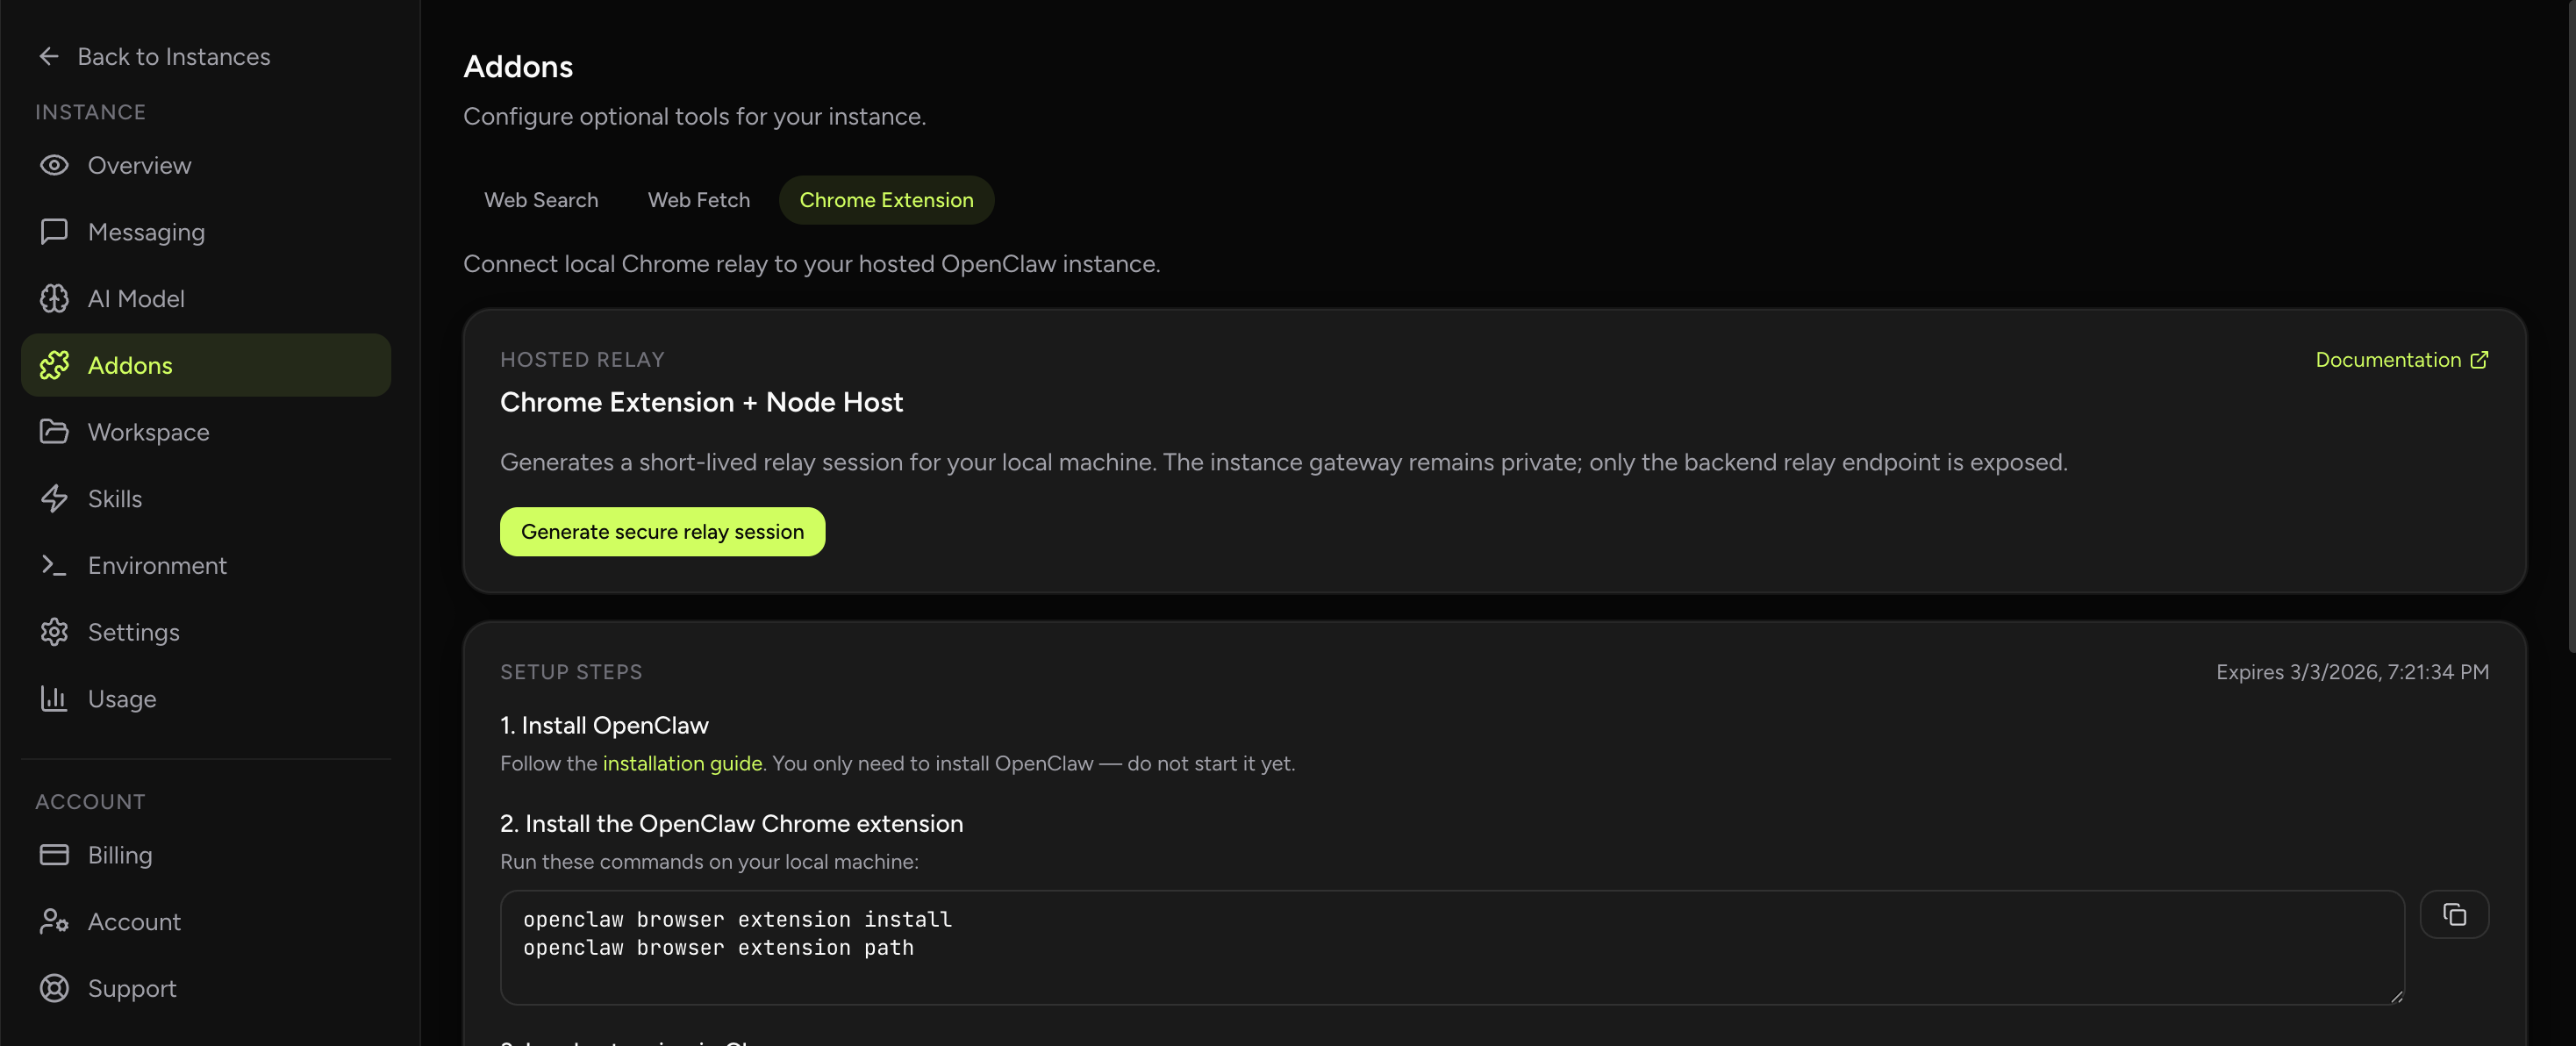
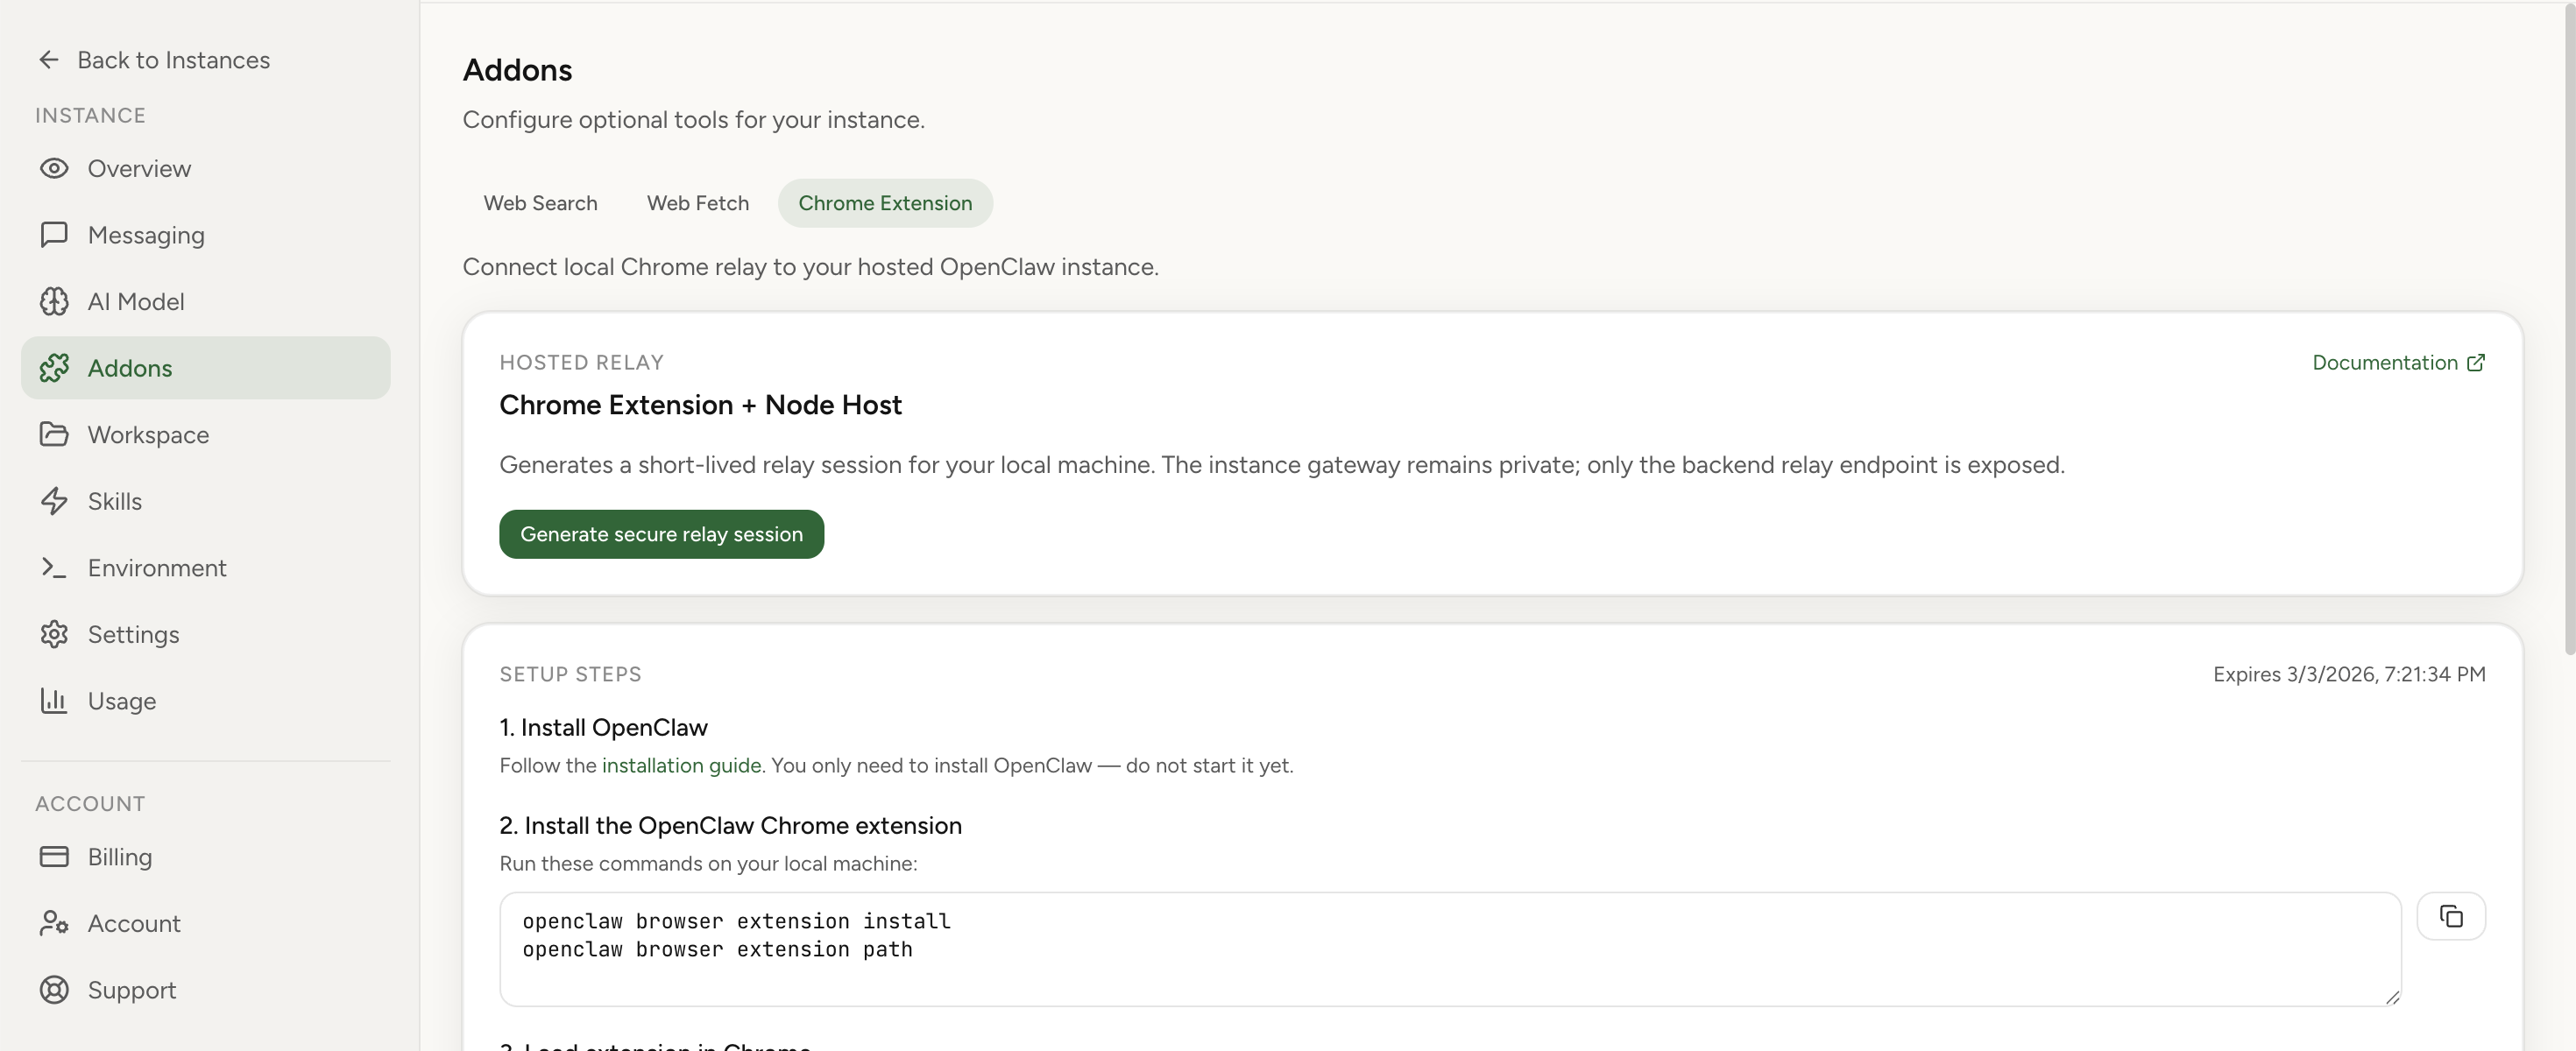
- Open your instance dashboard.
- Go to Addons → Chrome Extension.
- Click Generate secure relay session.
This creates short-lived connection data for your local machine. The key point: your hosted instance gateway stays private. You are not exposing your assistant directly to the public internet.
Step 2) Install the OpenClaw Chrome extension locally
Run these commands on your local machine:
openclaw browser extension install
openclaw browser extension path
The first command installs extension assets. The second prints the local folder path that Chrome must load.
Step 3) Load the extension into Chrome
- Open chrome://extensions.
- Enable Developer mode.
- Click Load unpacked.
- Select the folder returned by openclaw browser extension path.
- Pin the extension icon for easier tab attach/detach.
Step 4) Run the local node host command on the same machine as Chrome
In Addons, copy the generated node host command for your platform (macOS/Linux or Windows) and run it in a terminal. Keep this process active while you use Chrome relay.
First connection can take longer. Wait for Browser control service ready in terminal output. That line confirms your local node host is connected to your OpenClaw instance.
Step 5) Configure extension authentication correctly
In extension options, use the same value as OPENCLAW_GATEWAY_TOKEN from the node host command. Do not use relay session token as extension auth token.
This is one of the most common setup mistakes, and it usually manifests as “looks connected but tab actions fail.” If in doubt, regenerate a session and re-copy gateway token from fresh command output.
Step 6) Attach extension to the specific tab you want to control
- Open the target tab in Chrome.
- Click extension icon once to attach.
- Confirm badge shows ON.
- Click again to detach when done.
Tab-level attach behavior is intentional: explicit, reversible, and easy to reason about during daily operations.
Step 7) Run browser tasks from chat
Once attached, ask your assistant to perform browser tasks. Example prompt: “Open the current tab and summarize the page.”
Reliability notes from real usage
Shipping the feature is one part. Shipping a supportable workflow is the real work. These are the patterns that keep teams productive after day one:
- Treat the node host as a service: keep a dedicated terminal/window or run as managed process.
- Use explicit attach discipline: verify badge ON before issuing browser tasks.
- Rotate stale sessions quickly: relay sessions are short-lived by design; regenerate on expiry.
- Use gateway token only for extension auth: avoid token confusion between auth and debugging fields.
- Prefer deterministic prompts: include target intent (“summarize”, “extract”, “click X then Y”).
Security model in plain language
Chrome Extension relay support often raises one obvious question: “Are we opening a hole?” The short answer is no, because the model is scoped and layered:
- Hosted gateway remains private: no broad public exposure of your instance runtime.
- Session credentials are short-lived: replay value decays quickly.
- Tab attach is explicit: user controls what tab is active for extension relay.
- Auth token separation: gateway token governs extension auth path, relay token remains debug-oriented.
This is exactly the balance we care about in managed OpenClaw hosting: keep operational UX simple, but make security behavior explicit enough that advanced users can audit and reason about it.
Who should use this immediately
- Operators who need browser tasks against live authenticated tabs.
- Founders and PMs who do research/summarization in real browsing sessions.
- Teams with recurring web workflows where sandbox-only browser mode was too limiting.
- Users comparing managed OpenClaw with self-hosted browser-automation stacks.
Troubleshooting quick checks
- Node host running on same machine as Chrome?
- Did terminal output reach Browser control service ready?
- Extension auth set to OPENCLAW_GATEWAY_TOKEN?
- Target tab attached (badge ON)?
- Relay session expired? Generate new one.
Operational playbook for teams
If you run multiple instances or support multiple operators, standardize your rollout. Create a short internal runbook with three parts: setup ownership, troubleshooting ownership, and security ownership. Setup ownership means one person validates extension installation paths and OS-specific node host command behavior across your target environments. Troubleshooting ownership means one person keeps a known-good checklist and a repeatable reconnection flow when sessions expire. Security ownership means one person verifies token handling discipline, including where gateway tokens are stored, who has access to local terminal output, and what your team policy is for detaching tabs after workflows complete.
For production teams, we also recommend a tiny acceptance suite after setup: (1) attach one tab and summarize page, (2) run one deterministic click/type action in a safe internal tool, (3) detach and reattach tab, (4) regenerate relay session and reconnect, (5) verify failure behavior when badge is OFF. This sounds simple, but it prevents the majority of “it worked once and stopped” escalations. The value of the feature is not only browser control — it is predictable, supportable browser control in the real environments where your people already work.