Multiple OpenClaw agents are live in OpenClaw Setup
You can now create multiple OpenClaw agents inside one managed instance, use them directly in Built-In Chat, and route Telegram or Slack conversations to the right specialist without hand-editing config files.
What shipped
- New Agents tab: manage separate agents from the instance dashboard.
- Built-In Chat support: choose the agent you want directly in chat.
- Telegram and Slack routing: send direct, group, or channel conversations to the right specialist.
- Per-agent separation: each agent gets its own workspace, sessions, role, and optional model override.
- Fallback behavior:
mainstays available as the default lane.
Why this matters
A lot of users hit the same point: one OpenClaw agent starts doing too many jobs. Research, support, founder tasks, internal ops, and channel-specific conversations all start colliding in one place. The result is a messier context window and weaker behavior.
The new multi-agent OpenClaw flow fixes that without forcing you to spin up several separate environments. You keep one managed instance, but split specialist roles inside it.
Start in Built-In Chat. Create a few specialist agents, switch between them in the dashboard, and only add Telegram/Slack routing after the roles feel right.
How to use it
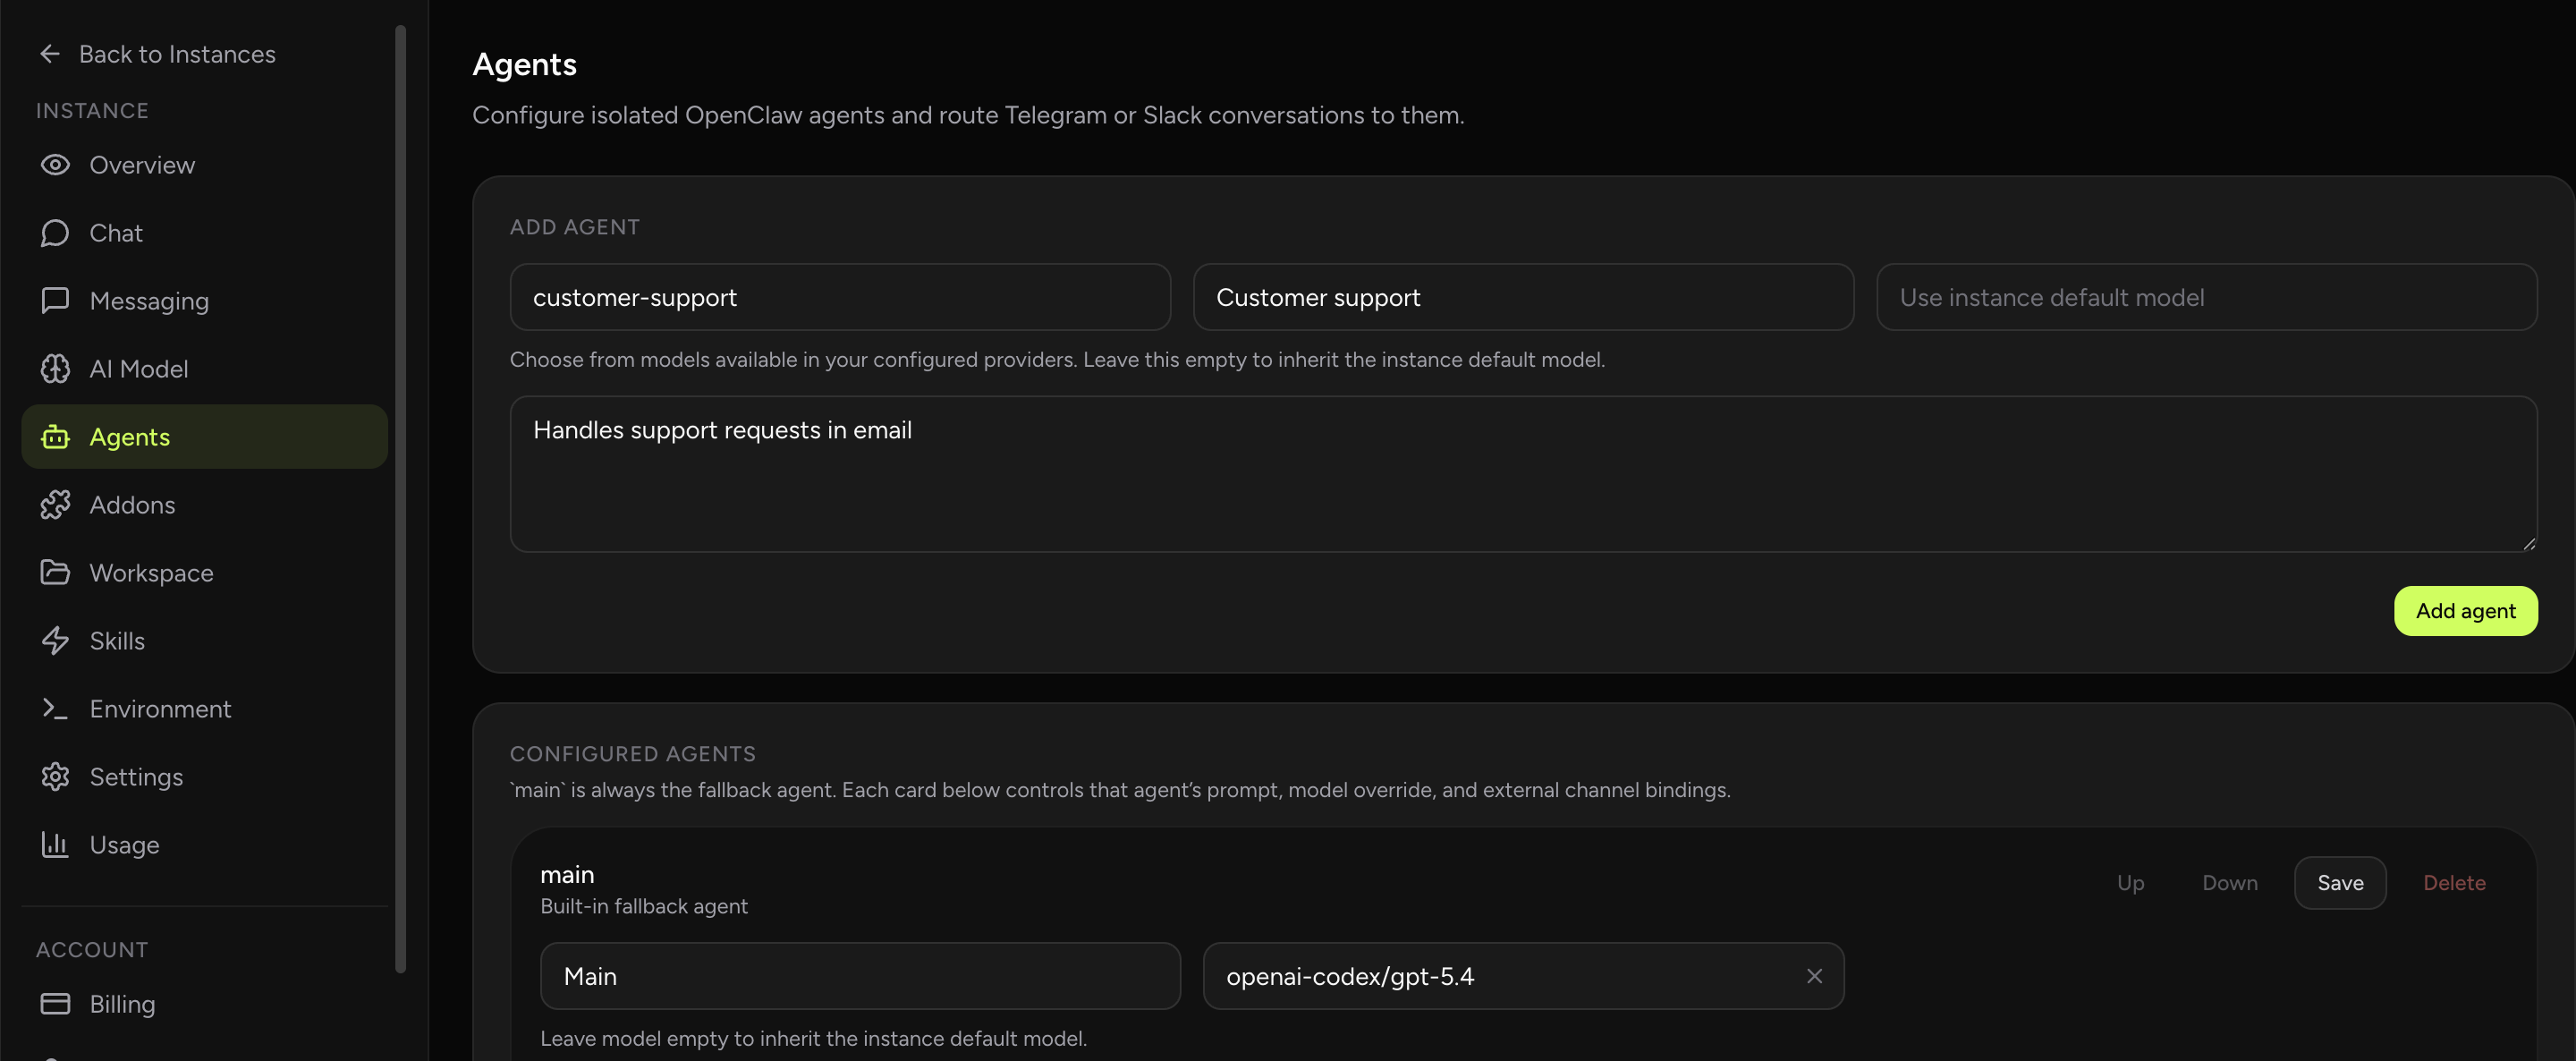
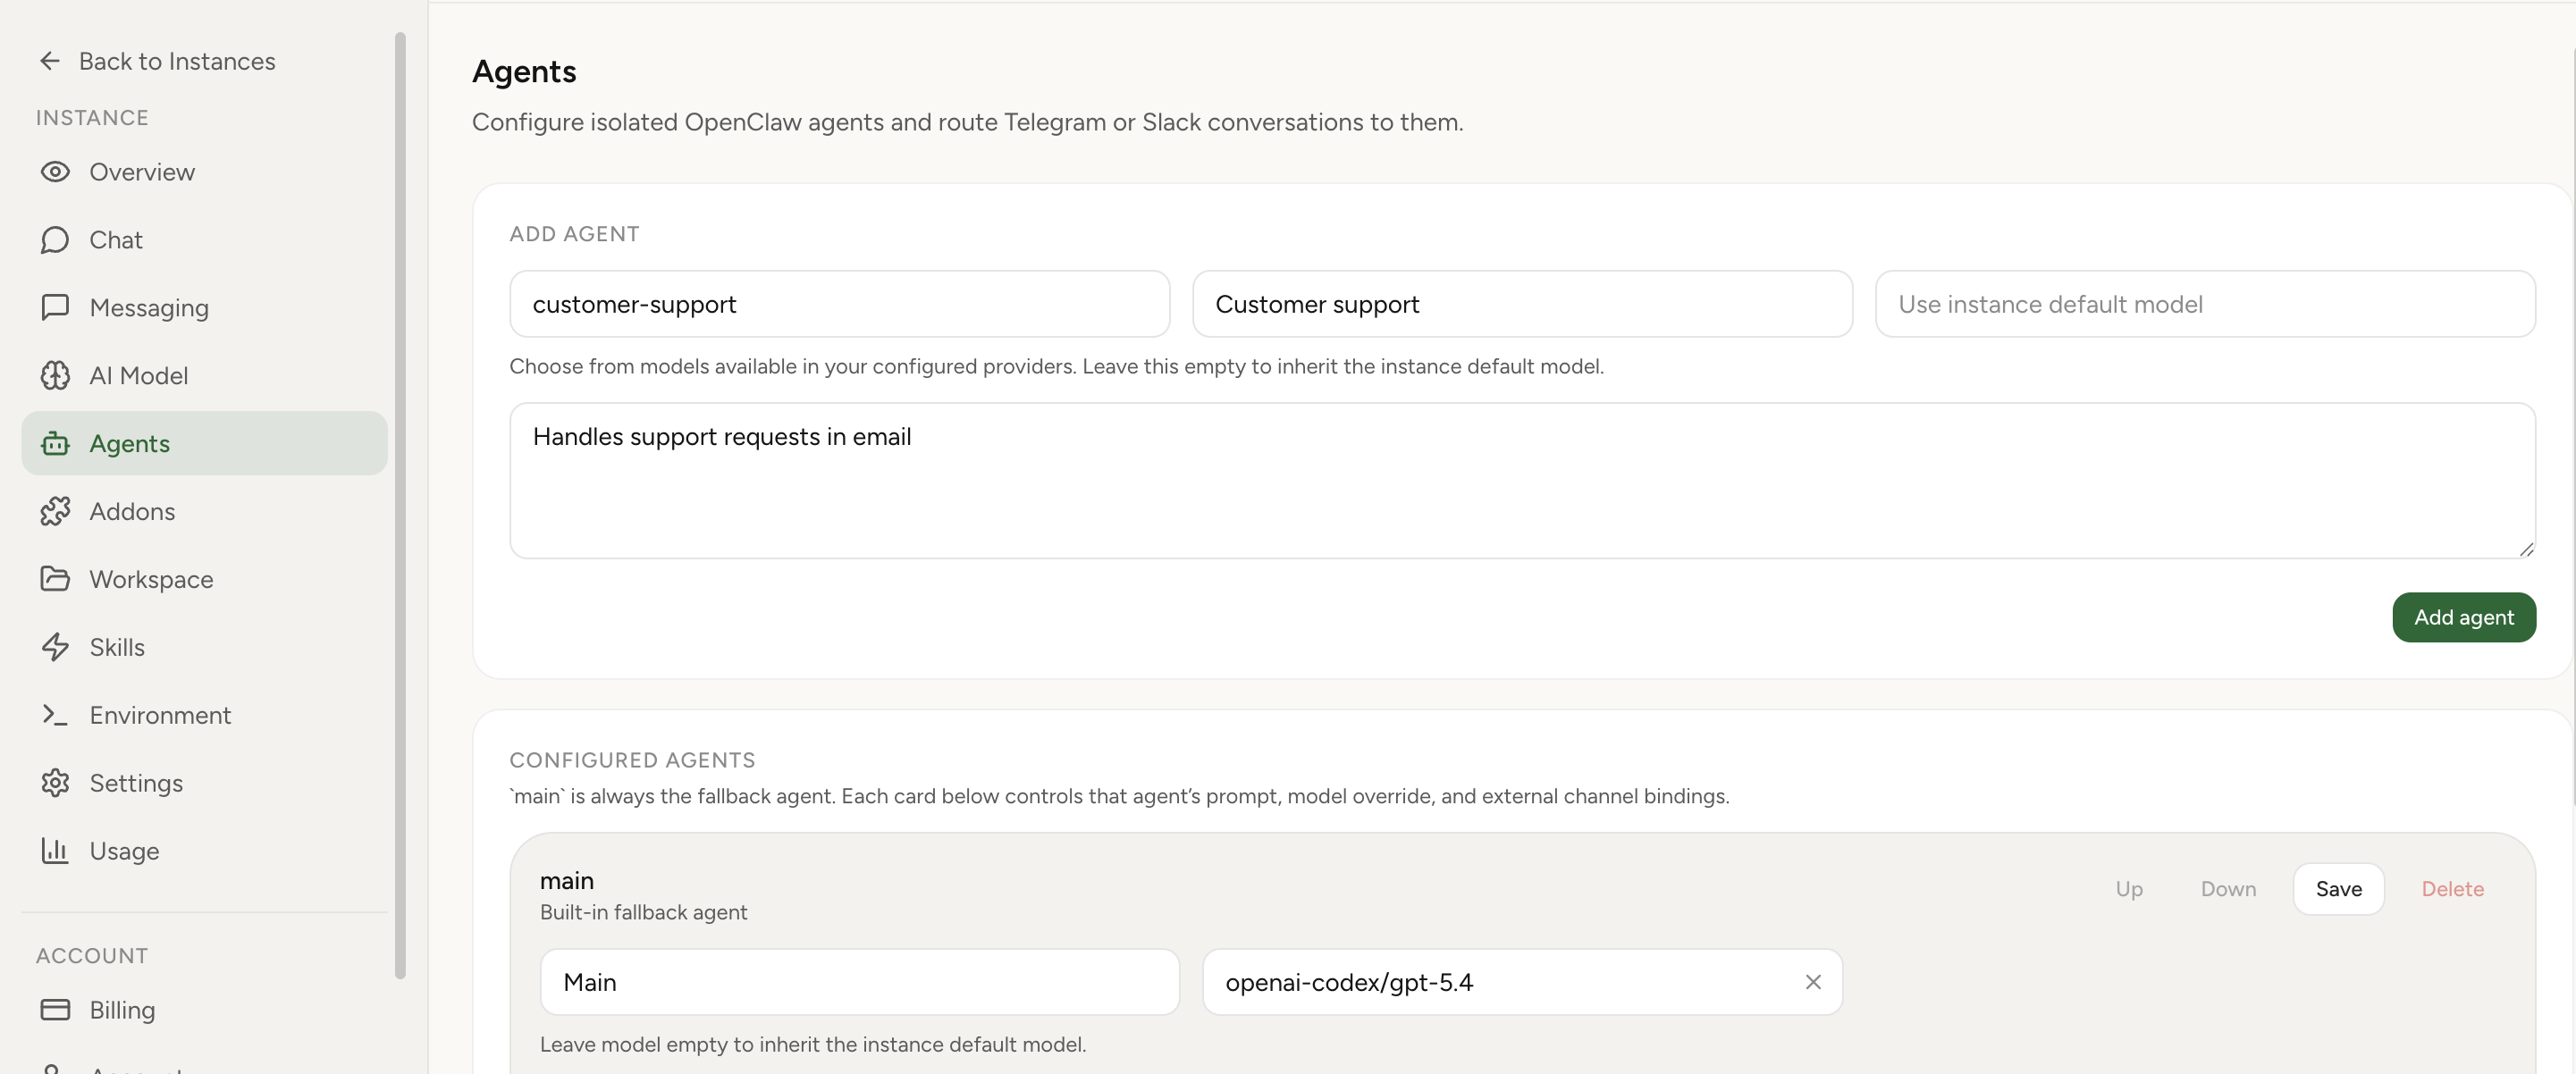
- Open an instance in OpenClaw Setup.
- Go to Agents.
- Create a new agent for a specific role.
- Give it a name, description, and optional default model.
- Talk to it directly in Built-In Chat, or add Telegram/Slack bindings if you want external routing.
What stays separate vs shared
- Separate: workspace, session history, role, optional model override, and agent-local auth profile storage.
- Shared: hosted runtime, billing, main platform controls, and some provider setup.
Provider credentials are shared per instance. If you need fully separate runtime boundaries, separate instances are the right answer.